> Knowledgebase > Beginner guides > Viewing Article
How to Mount ISO using KiwiVM and install Turn-key Linux
NOTE: We post this article sent to us without any edits.
Quick. Simple. Ready-to-use. Fantastic!
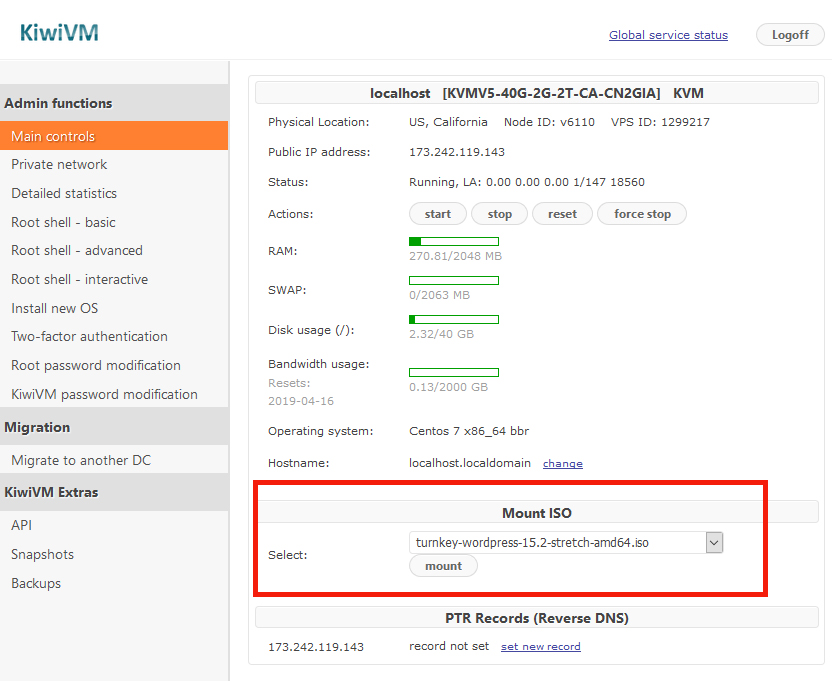
Let’s try to install Wordpress from the Turnkey-wordpress ISO image:
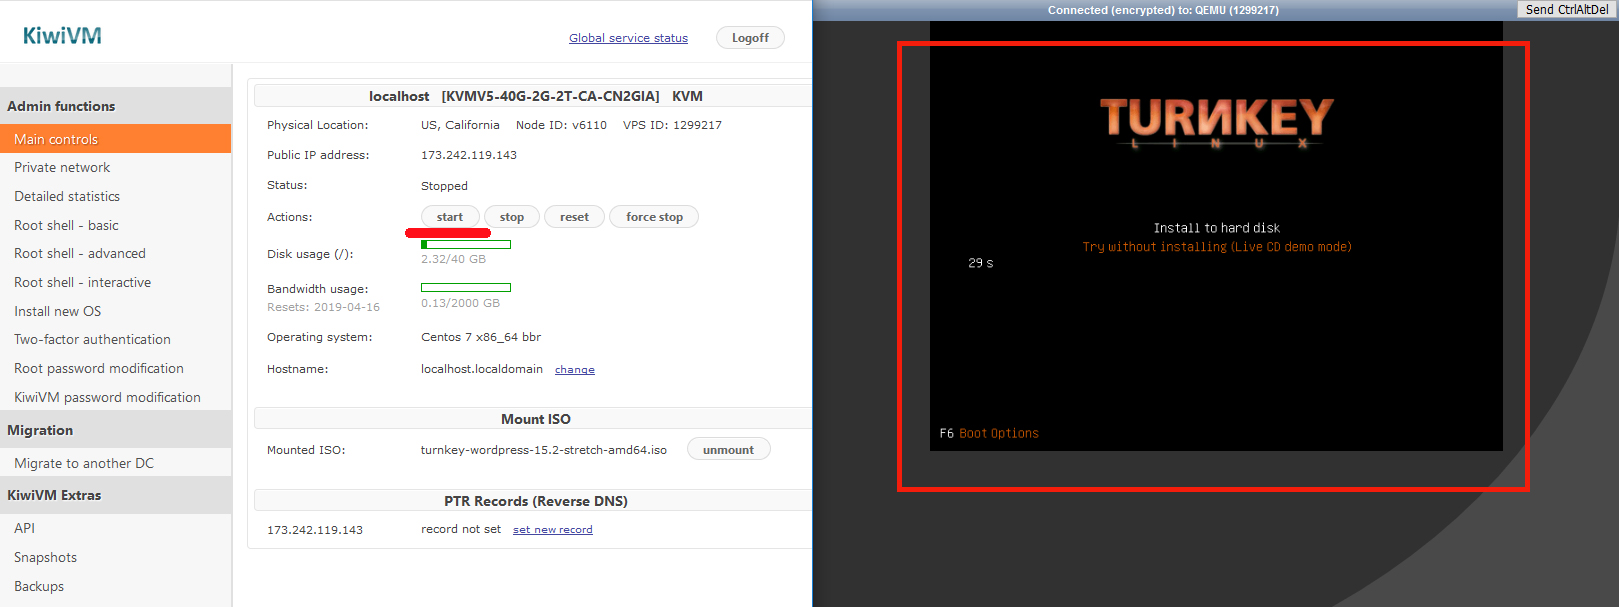
1. Select Wordpress from the drop-down menu. Click [Mount].
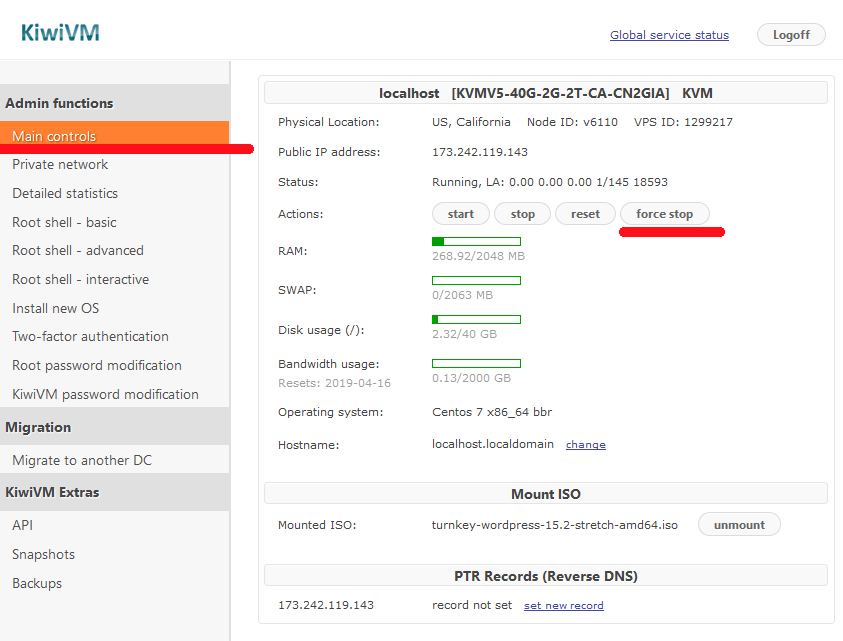
a) Receive message: "IMPORTANT: In order for changes to apply, VM must be completely stopped..."
b) Go to KiwiVM Main controls and stop VPS by pressing button [Force Stop].
(While button [Stop] will also work, it might take longer to stop VPS).
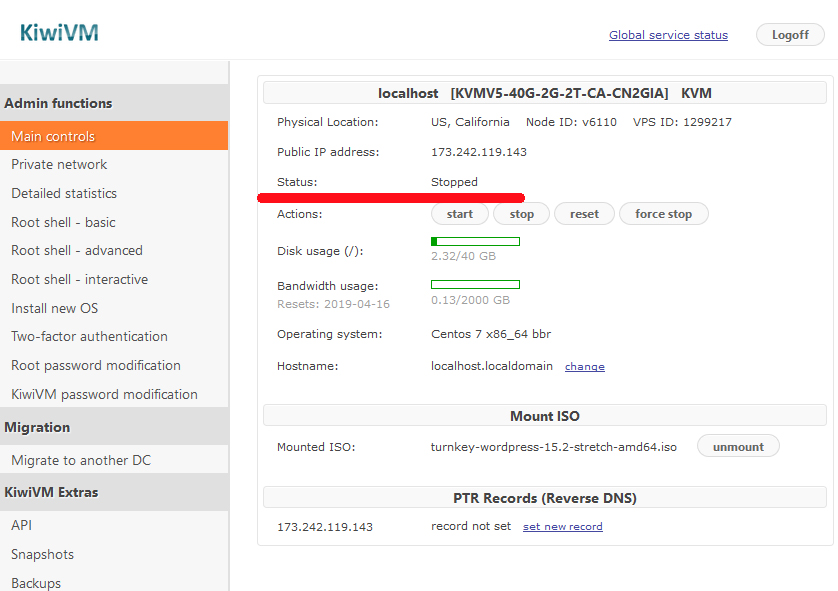
c) Check your VPS status by returning back to Main controls, it should display:
Status: Stopped
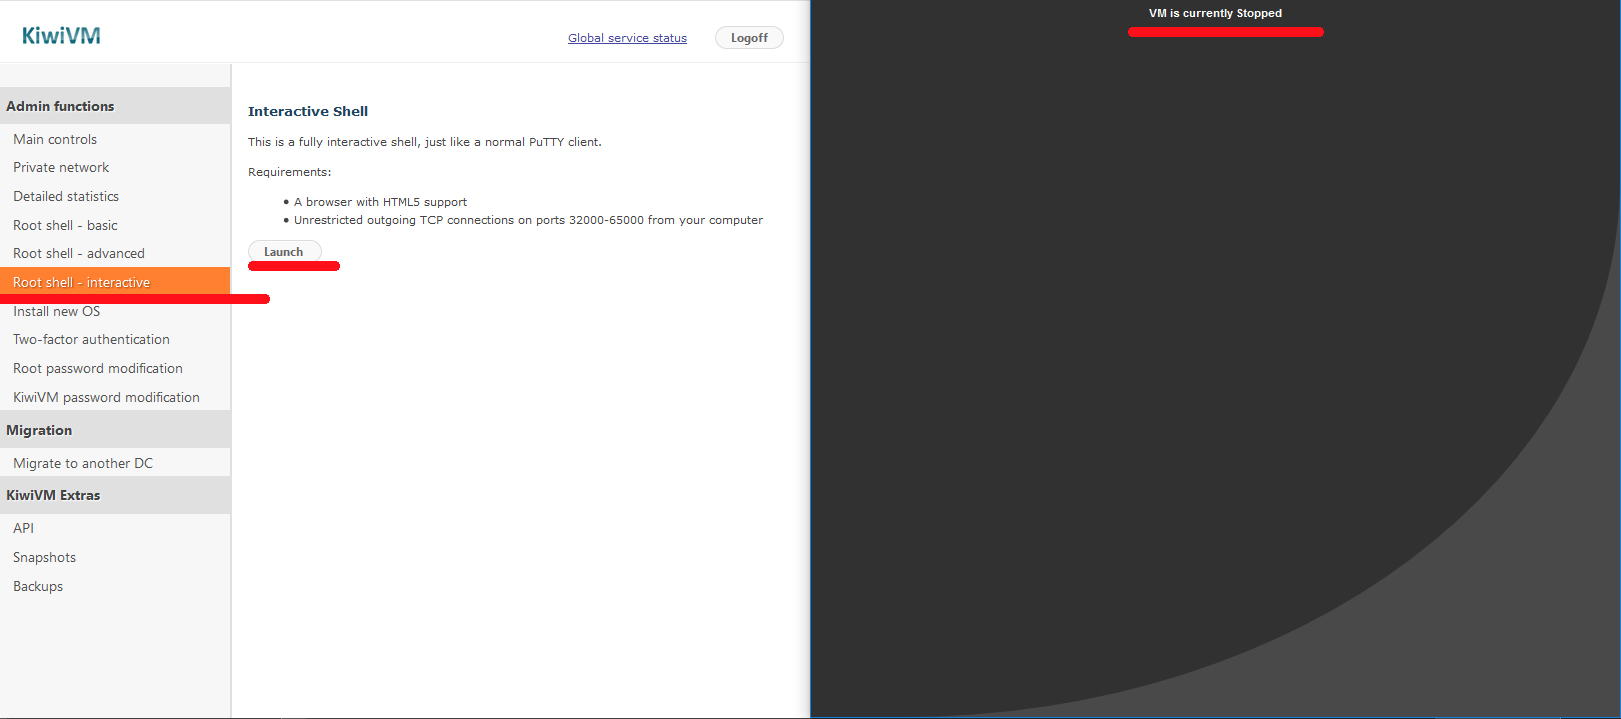
2. In the KiwiVM choose menu link "Root Shell interactive". Press button [Launch].
Receive message "VM is currently stopped"
This is OK. Our VPS is indeed stopped. Keep this window open.
3. Back to KiwiVM Main controls and start VPS by pressing button [Start].
4. Now Root Shell Interactive is "awaken". Just wait for the countdown and see it loading.
5. The actual Worpress mounting begins:
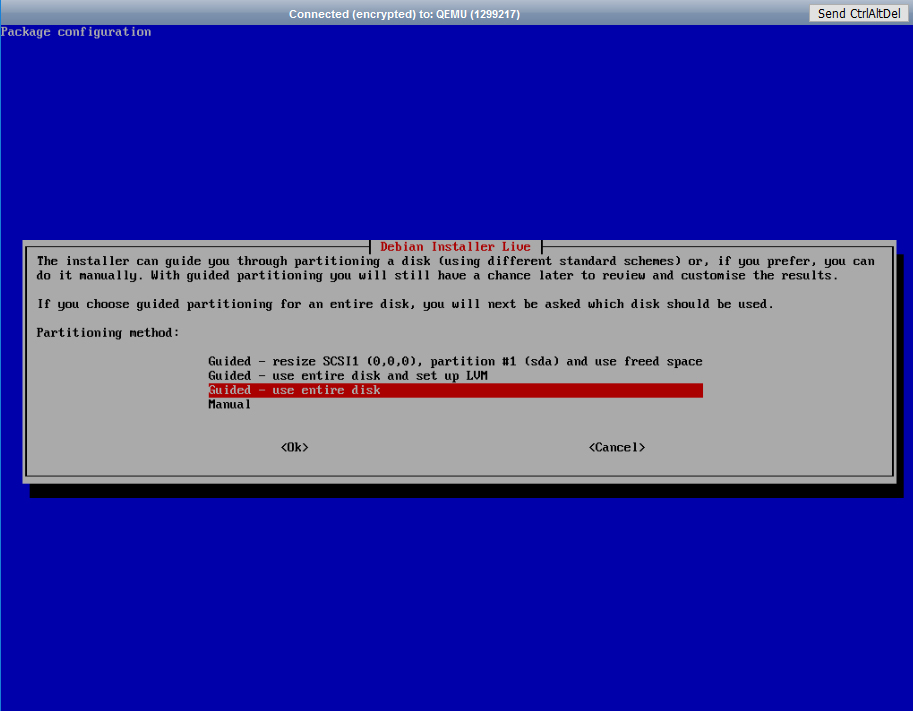
a) Prompted to select partitioning method:
Select "Guided - use entire disk". Press [Enter].
b) Prompted: "Write the changes to disk?"
Select "Yes". Press [Enter].
c) Prompted : "Install GRUB boot loader to the master boot record?"
Select "Yes". Press [Enter].
d) Prompted: "Would you like to restart now?"
NOTE: If this is your first installation, before you select "Yes" and Press [Enter], please read step 6 right now, as you’ll need to act faster on that step.
6. Watch closely as after restarting and loading it goes back to the initial Turnkey welcome window and starts countdown (30 sec) to RESTART the whole installation process all over again ...Evil laugh...
So the next very quick step is to press [Space] key on your keyboard to stop the countdown. (Alternatively, you can go back to the KiwiVM Main controls and press button [Force Stop] to stop your VPS).
7. Unmount the ISO by pressing button [Unmount].
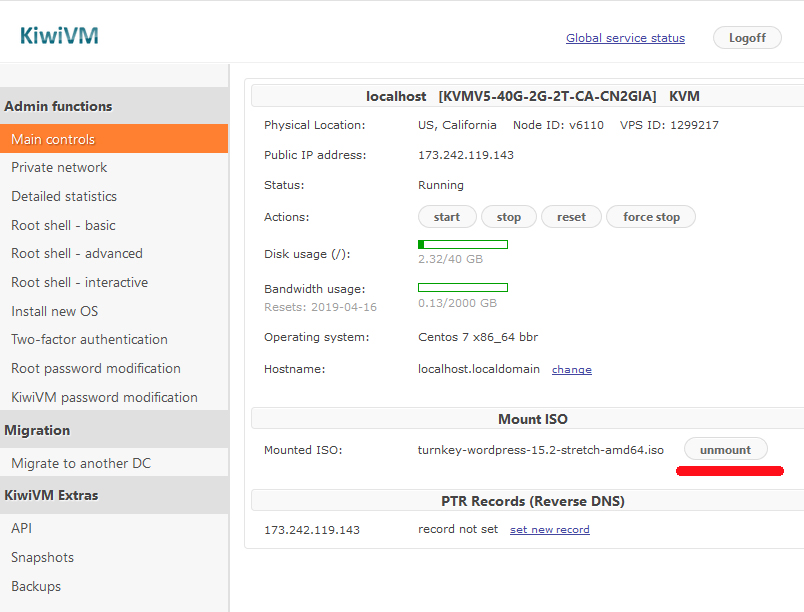
a) Receive message: "In order for changes to apply, VM must be completely stopped"
b) Go to KiwiVM main menu and stop VPS by pressing button [Force Stop]
c) Start your VPS by pressing button [Start].
8. Go back to Root Shell Interactive window.
Wait for the loading to complete until you see the prompt to enter Root password.
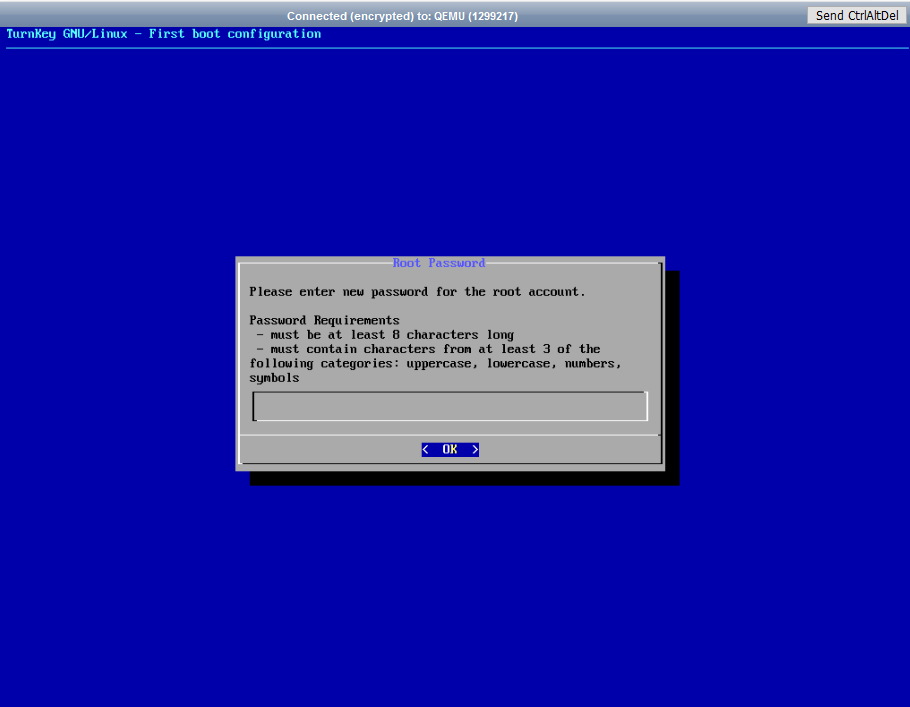
a) Enter all passwords asked (Root password, MySQL password, Wordpress admin password).
b) Enter all emails asked.
c) Prompt "API Key". Select "Skip" (use Tab button or Down button on your keyboard to hop to the "Skip" option)
d) Email: enter your email and press "Enable"
e) Correct email? "Yes"
f) Security updates "Install"
g) Reboot now? "Reboot"
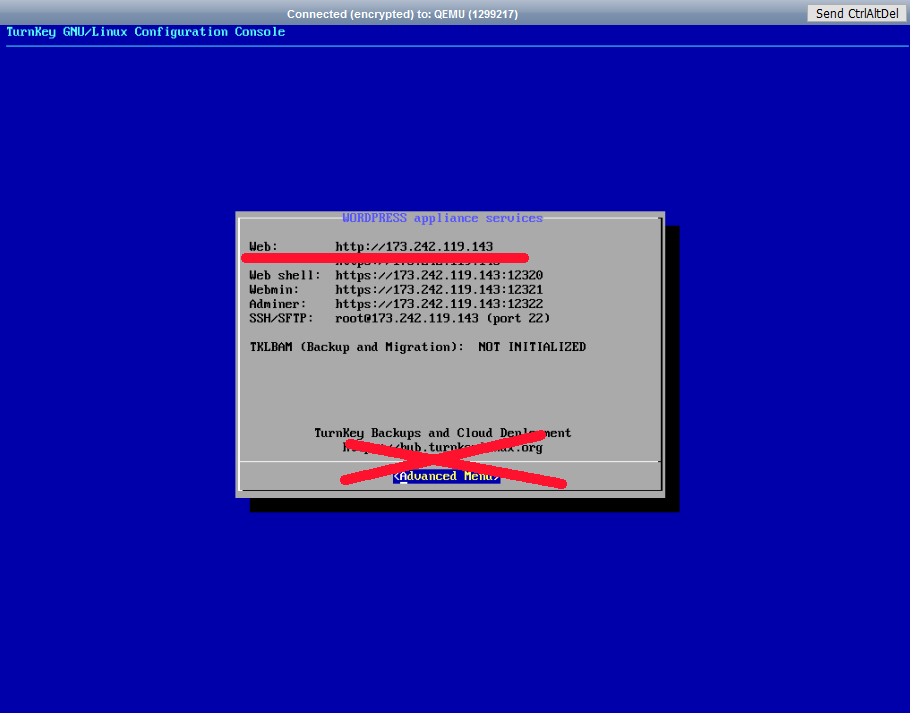
9. After reboot, you get a Final screen, where you don’t need to press anything anymore.
(In our example with Wordpress it reads: "WORDPRESS appliance services", "Adbanced menu").
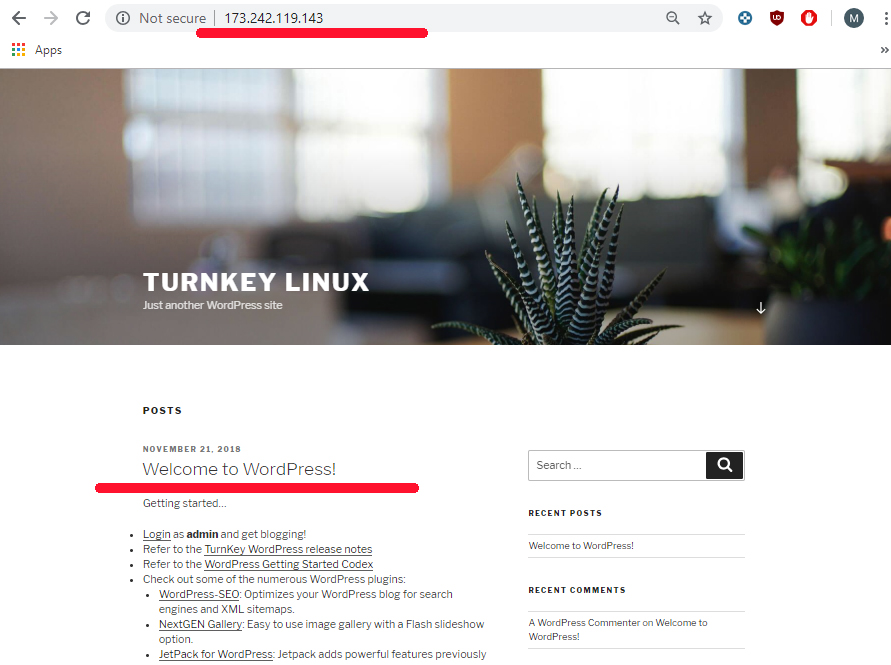
No need to press anything. Instead, go to see your new Web:
In your browser type in the IP address as shown on the screen (you’ll have your own IP shown there):
IT WORKS!
Now, to add your domain, follow this article:
How to host a website on Linux VPS (Centos 7 OS)
VPS Features
All VPS come with the following:
- PPP and VPN support (tun/tap)
- Instant RDNS setup
- Full root access
- Powered by KiwiVM
Satisfaction Guarantee
Thinking about switching to us?
- Instant setup
- 99.9% uptime guarantee
- 30-day refund policy